
Making a Vermicompost
Step 1 - Acquire 3 same size buckets.
Step 2 - Drill holes in the bottom of buckets #1 and #2
Step 3 - Stack buckets #1 and #3 together, save bucket # 2 for later use buy stacking underneath bucket #3
Step 4 - Drill holes in the lid
Step 5 - Add 1 soaking wet and shredded newspaper to bucket # 1
Step 6 - Add several cups of mulched organic waste from your yard or kitchen
Step 7 - Add red wigglers
Step 8 - Spread shredded paper over the pile of worms and mulch.
Step 9 - Secure the lid and enjoy your new vermicompost.
Pro Tip: Want a compost that is large enough for a family of 4+? Make a vermicompost out of 60L Rubbermaid Totes. Same set up, twice the composting!
Maintaining a Vermicompost
TLDR: Feed them any plant based produce you would put in your regular compost, collect the rich black soil (worm castings) every few months and start the process over again with a few cups of worms.
Step 1 - Allow the colony to grow by leaving the worms in the mulch for several weeks. (If you have purchased a kit, skip this step, your worms are ready.)
Step 2 - Store in a dark place where the temperature does not drop below 5 °C but does not exceed 28 °C , the ideal temperature being 20 - 25 °C.
Step 3 - Ensure that the worms are damp, not soaked and most certainly NEVER DRY.
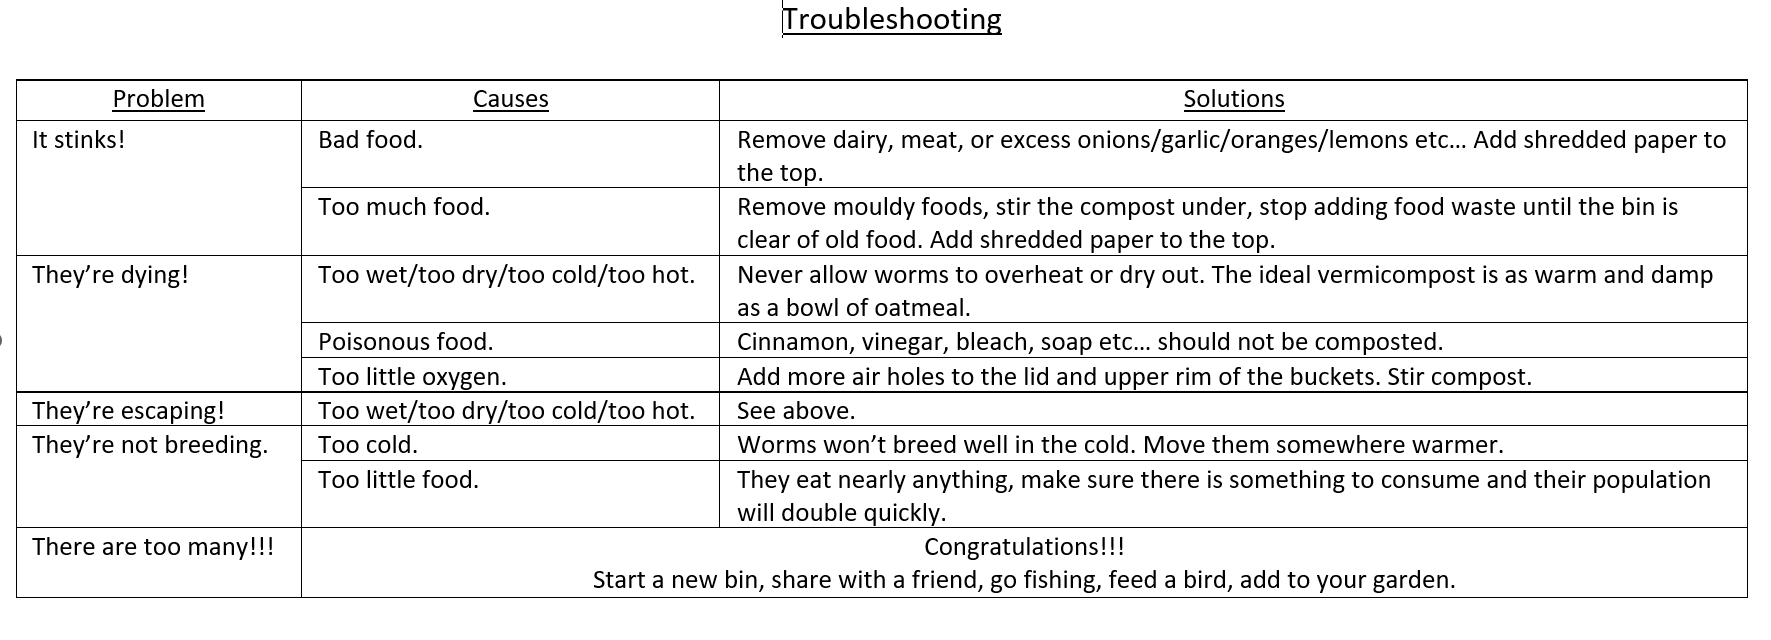
Step 4 - Once the worms have doubled or tripled in population (you see lots of worms on the surface and side) begin to add household waste. While all waste will be consumed eventually it works most quickly if food waste is blended or finely chopped. I cannot recommend mulching your food enough. Use a blender or chop the compost into tiny pieces. Worm do not have teeth and digest waste through enzymes. They are basically tiny straws digesting food once it has decomposed into a coleslaw or apple sauce consistency. A complete banana peel may take several weeks to break down before the worms can consume it. A finely chopped banana peel or even better a pureed one takes only a few days. I collect food waste all day long in a bowl. At days end I put everything the blender and pour it across the worms careful not cover the whole surface in the paste so as not to smother them. Then I rinse my bowl and blender and start again tomorrow.
Step 5 - Feed worms only foods they can digest. Meat and dairy should not be composted. Citrus fruits, onions, garlic, chives, shallots, etc... may be added in moderation, while digestible they can cause your worm bin to smell; so add accordingly. All other types of organic waste are acceptable. Tea leaves, coffee, eggshells, vegetables, fruit, paper, house plants, hair, animal fur, 100% cotton, toilet paper rolls etc...
Step 6 - Because the worms have no teeth they utilize grit in the digestion process. A crushed eggshell or a spoonful of sand every few weeks is all they need.
Step 7 - Add paper, wood chips, or grain meals/brans if you discover that the worm bin has an unpleasant odor, a thin layer dusted over will prevent a smell.
Step 8 - Remember if you add oats, rice or dried beans they will absorb moisture. If you add enough they will plump up stealing all the liquid from the bin. Add them in moderation or add water if you are concerned about the humidity.
Step 9 - Don't over feed the worms. Too much food can lead to mold which is bad for humans and worms. Worms will eat up to half their body weight each day. Remember if there is an entire potato un-mulched at the top it may take a week for the worms to eat their way through. If there is more food waste then the worms an handle, wait two or three weeks for the population to catch up or create a new bin.
Step 10 - Once bucket #3 has collected enough water or "compost tea" that it is odorous or begins to dampen bucket #1 empty it into a watering can. Use the tea to fertilize plants.
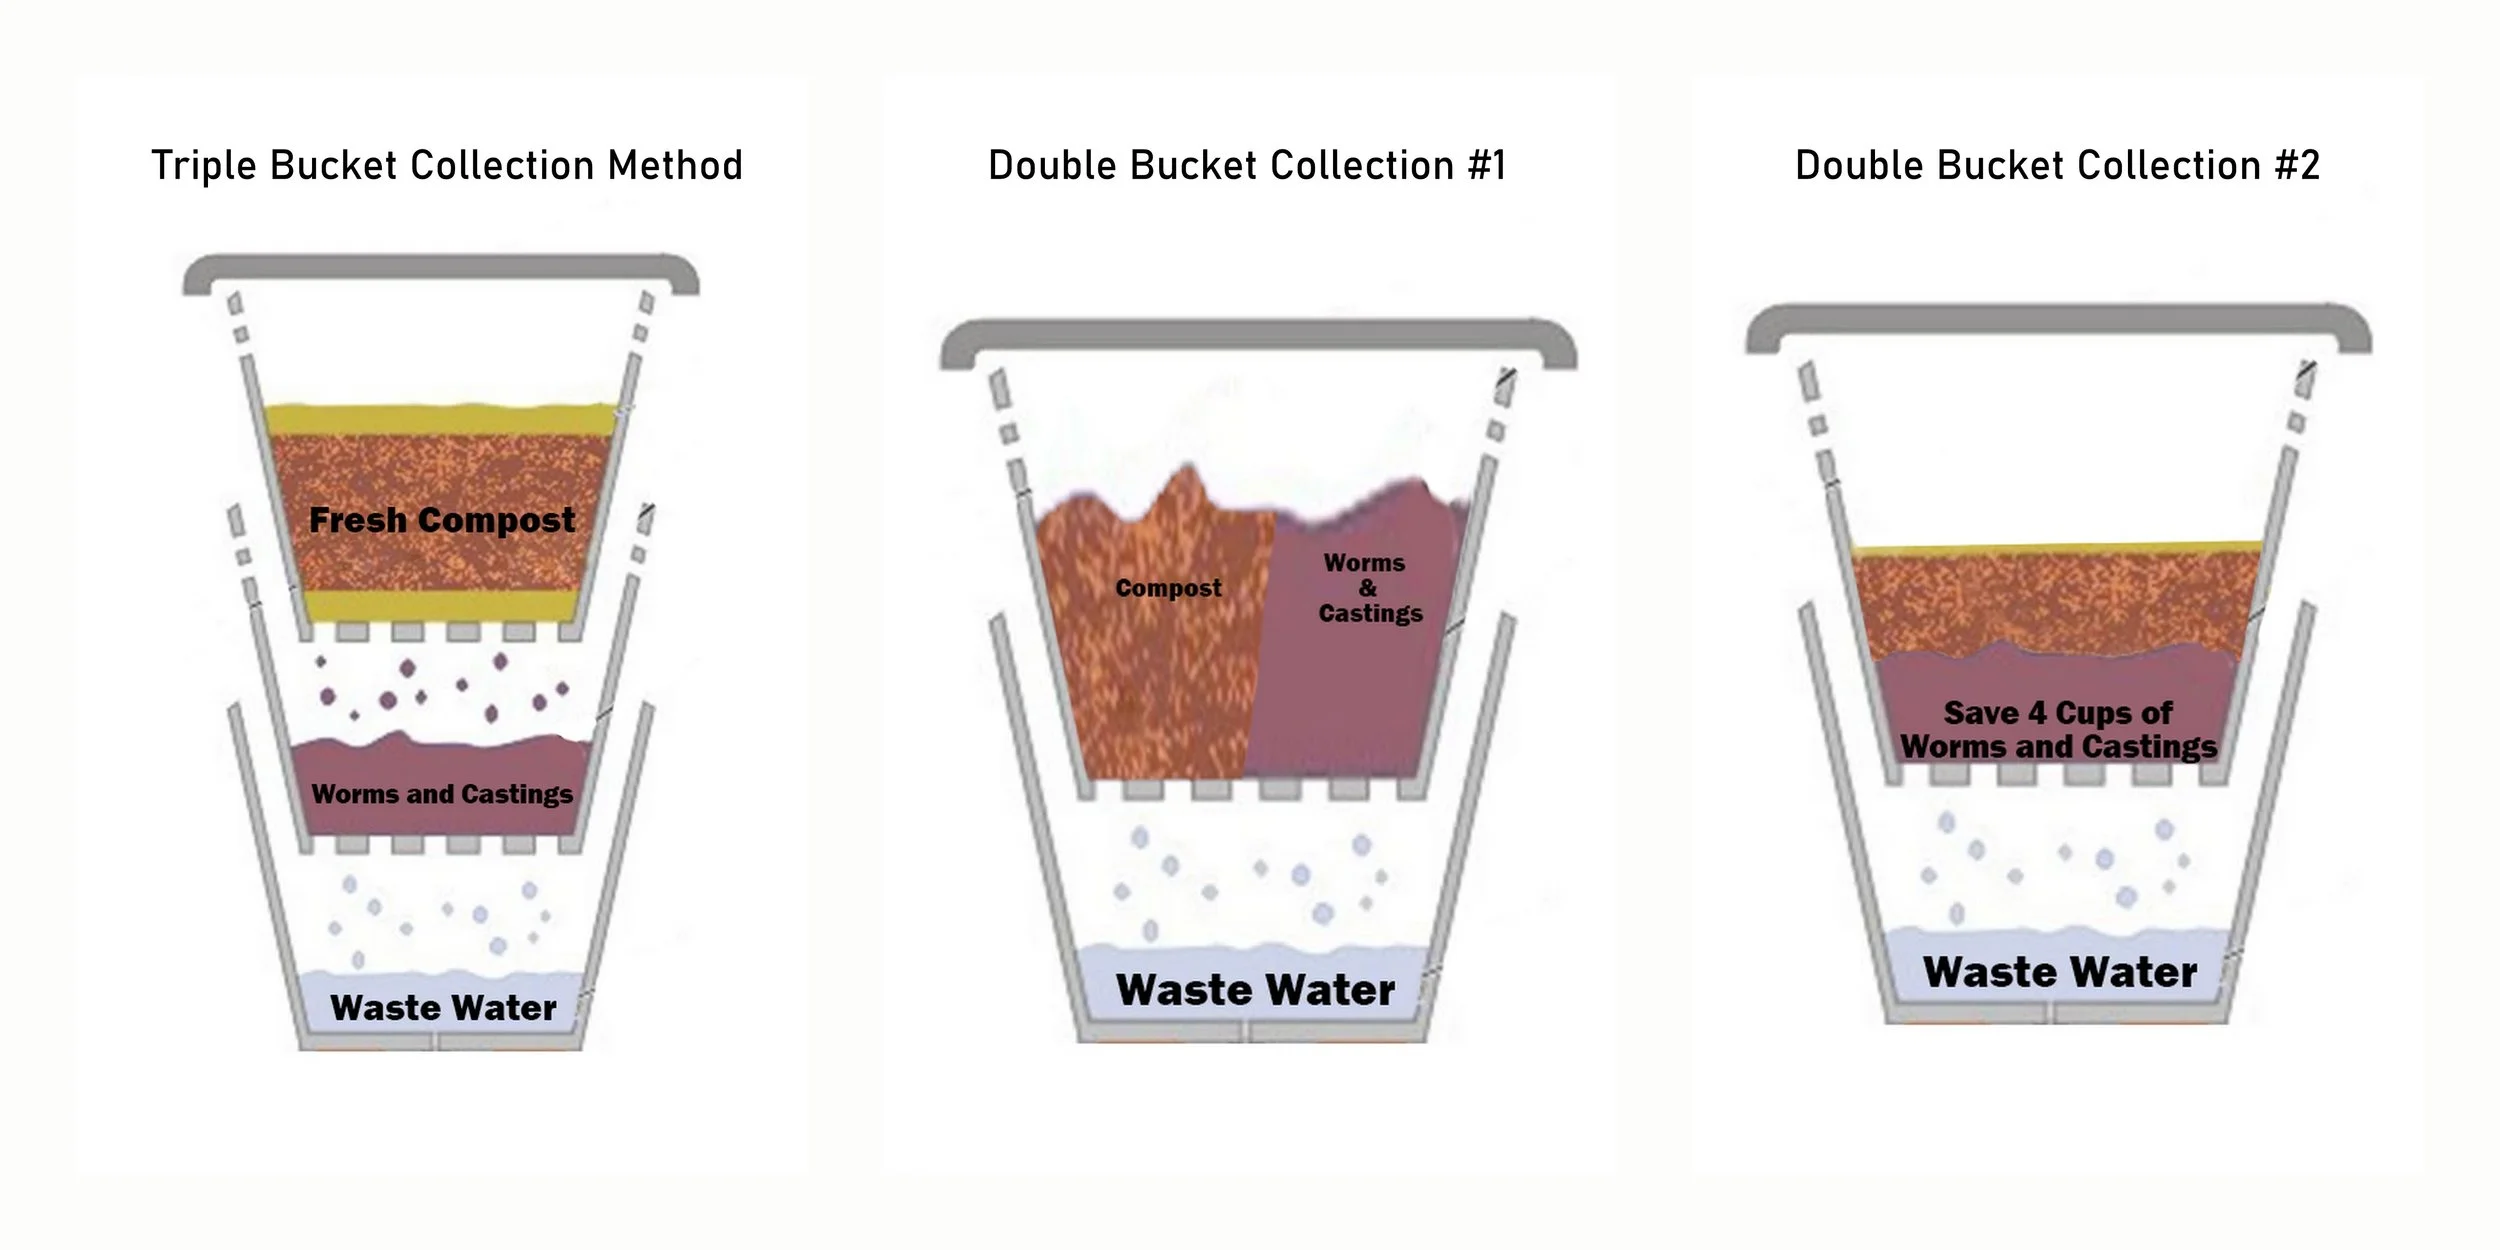
Step 11 - Harvesting the soil (worm castings) is easy. Once 1/2 of bucket #1 filled, starve the worms for a week or more. Place bucket #2 on top, switch the lid from #1 to #2. Buckets will now order 2-1-3. Begin adding food mulch and damp paper to bucket #2. The worms will travel up through the holes in the bucket into #2. After a week or two bucket #1 should be full of soil and very few worms. Use the high nutrient soil and place the now empty bucket in the bottom of the stack. Repeat the process as needed.
If you are using a double bucket system not a triple you can harvest in one of two ways:
Empty all but a handful of worms from the bucket and start rebuilding the colony from the remnant. This method is simple but re-population can be slow.
Feed the worms on one side only. Pour food only on the left throughout the month # 1. At month’s end harvest all the soil on the right side for the bucket; all worms should have migrated left. During month #2 switch sides by pouring food only on the right and harvest on the left at month’s end.
What to use your worm castings for?
Add directly to your garden or houseplants.
Add to your watering can while fertilizing your plants.
Mix in with larger compost to increase good bacteria to stimulate decomposition.
Mix into potting soil when starting new seedlings indoors.
Suitable for use in base layers of ponds and heavily planted fishtanks.